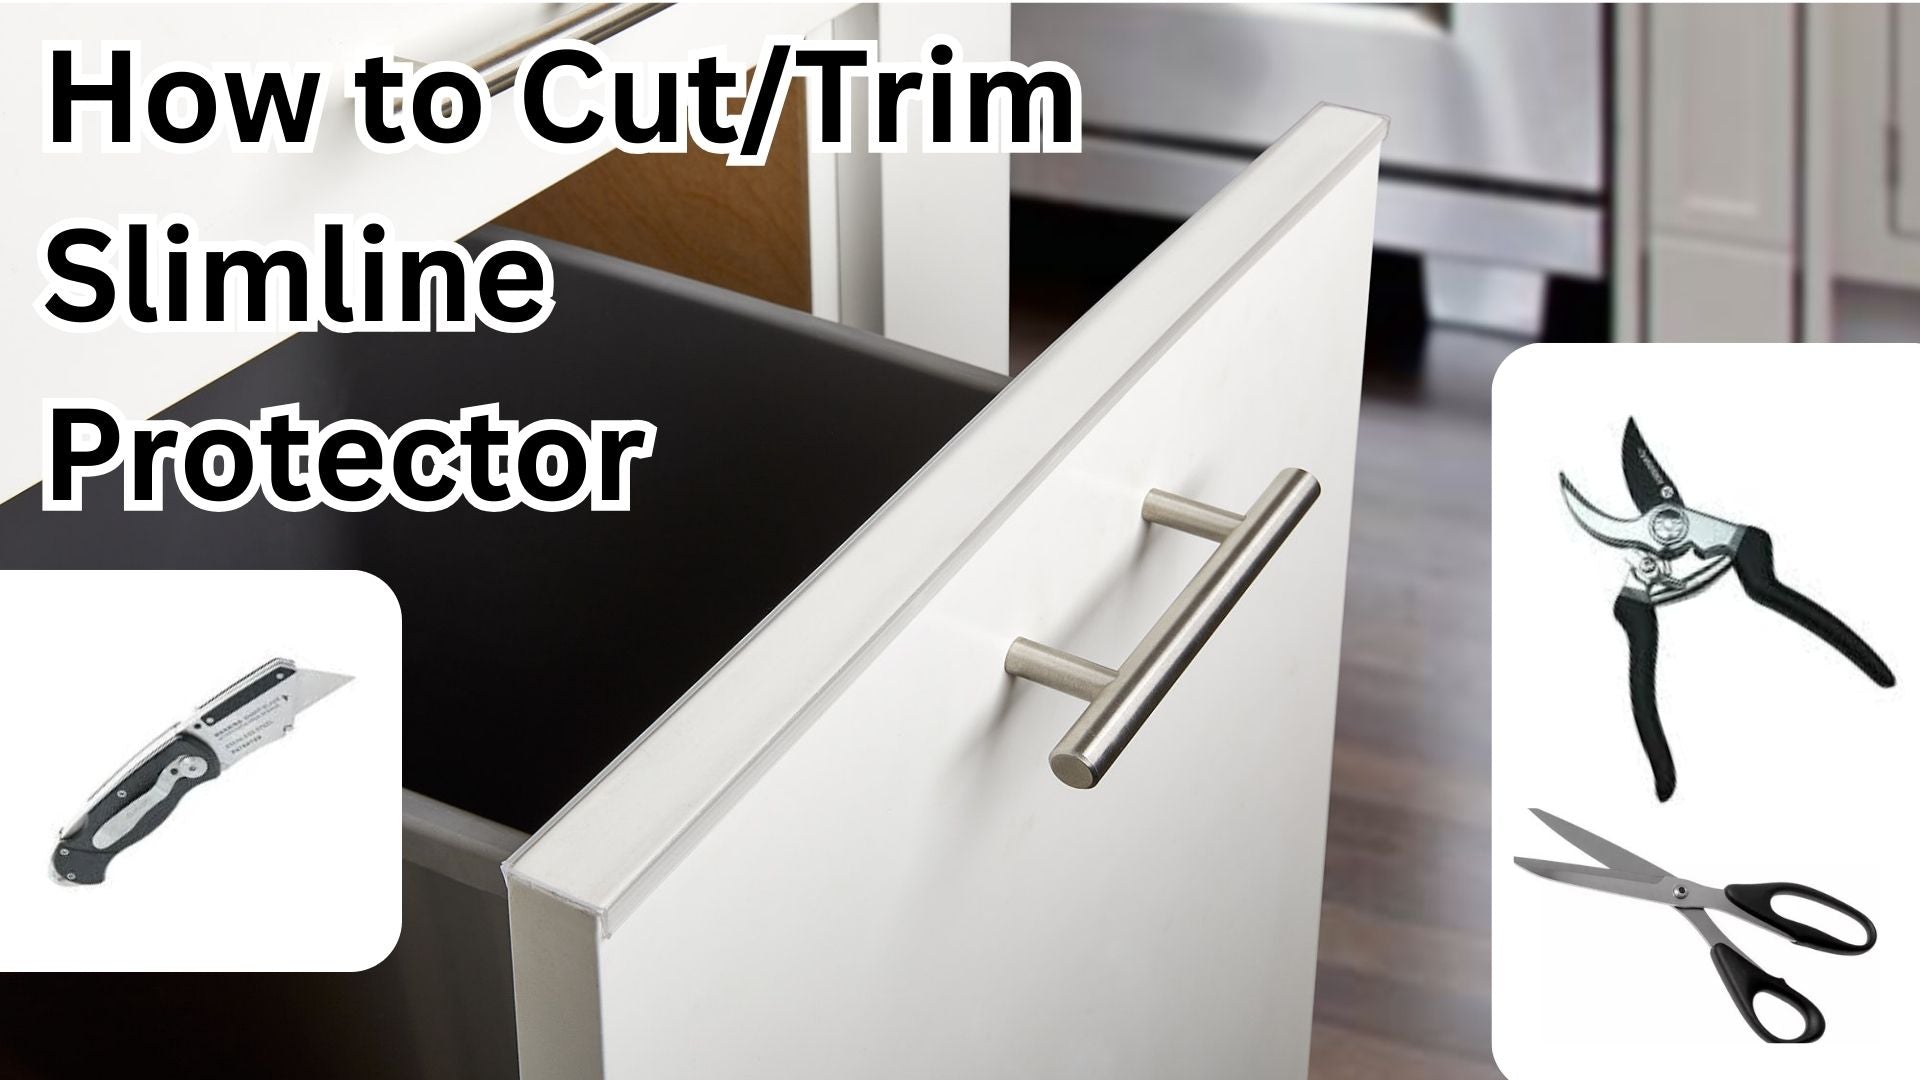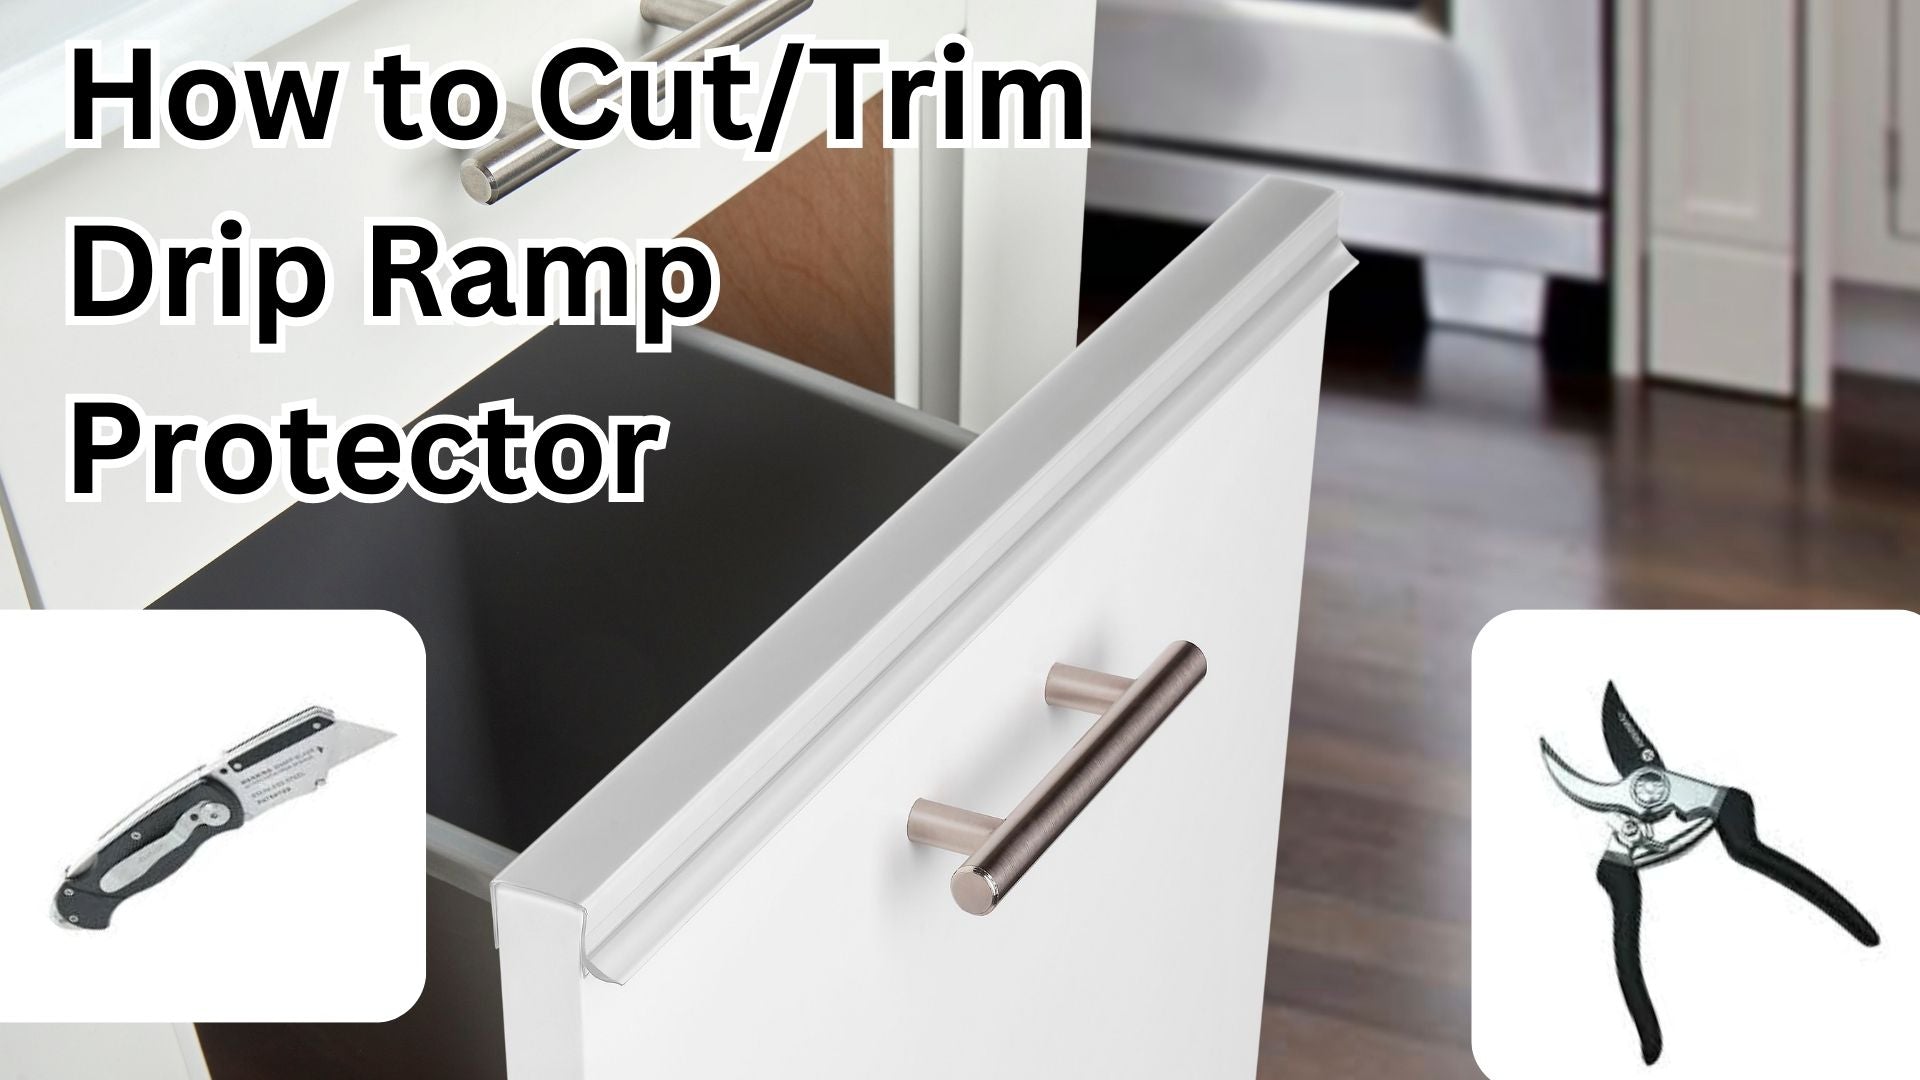
How to Install Slimline | How to Install Drip Ramp
Slimline Installation

Place the Slimline on your desired door with one end flush against the edge. Smooth flat and determine if trimming is necessary.

Use a marker (preferably Dry Erase) to mark the end of the cabinet on all three sides of the Slimline. This will be your guide for cutting.

Using a sharp pair of scissors, place the protector upside-down with one leg in contact with the blades. While holding the protector with your left hand, cut along the line. Make sure material being trimmed is to the right of the scissors